
Balance Long Term Planning is an exciting new tool for leaders and teachers to plan their personalised curriculum across the year, so they can see exactly what they are teaching and when. This will not only allow teachers to make sure they have full coverage throughout the year, but also allow them to carefully plan in teaching and assessment points, as they wish.
Quick Steps
- Navigate to Admin, select Planning, and check or edit your term blocks
- Navigate to Planning and click Start Plan alongside the relevant subject
- Select the relevant year from the tabs across the top, then simply drag and drop parts of your curriculum into the term blocks to start planning
- When you're happy with the plan, it's time to put it in a format you can download - Select the PDF icon in the top right corner of the screen to download your plan. You can choose whether you want to create a PDF showing all term blocks or just a few you've selected.
Need More Detailed Help?
Editing Term Blocks (Administrators Only)
Before you begin planning, we recommend your Balance Administrators edit your terms, so they are reflected accurately in your plans. To edit a term block, navigate to Admin > Planning or click the Edit Term Blocks option on the Planning page.
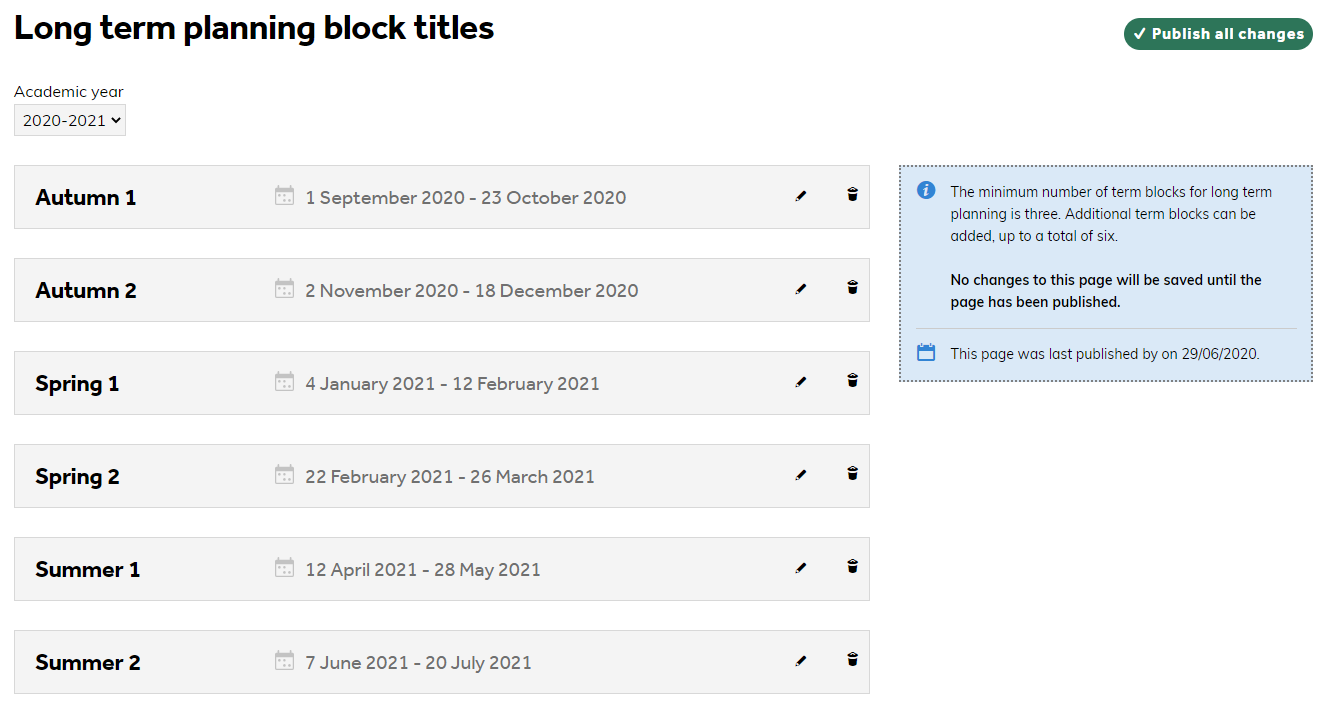
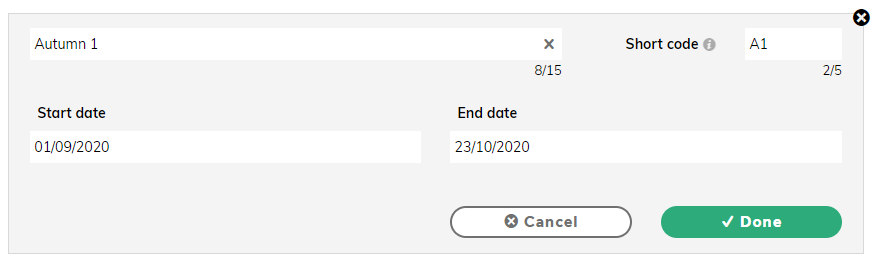
To edit a term block, click the pencil icon alongside it. You can then adjust the term name, dates and code. Click Done when you're finished.
Click Publish all changes when complete. Your edited term block will now be visible in the Planning area and reflected across the whole school for that academic year.
Planning Dashboard
To access the Planning module, click Planning on your main toolbar across the top of the page.
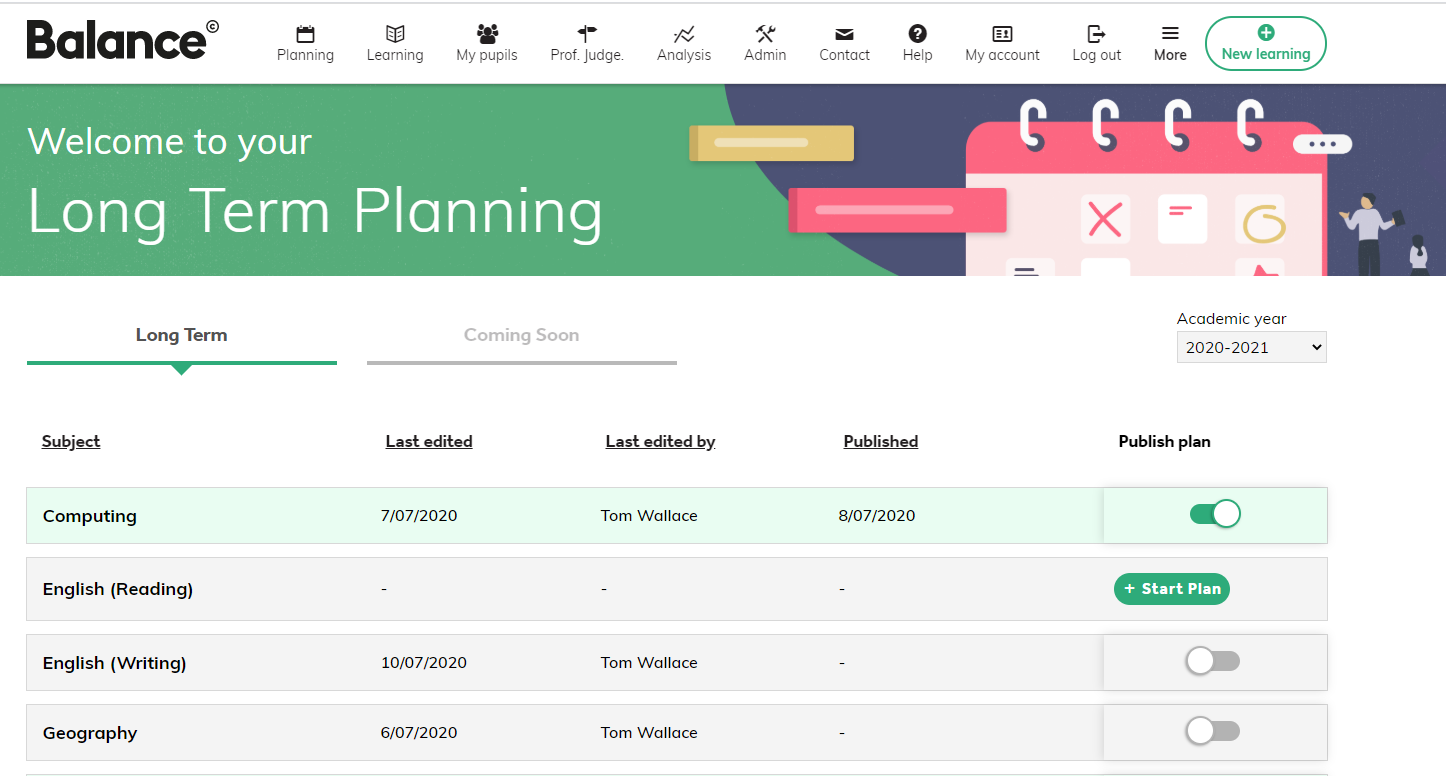
When you land here, you are presented with a list of all your subjects and plans (if you have them). Any subject row you do not have a plan for already will contain a Start Plan option.
The table here shows you the subject, when the plan was last edited, who it was last edited by, the published date and whether or not it is currently published or not. Switching the Publish Plan toggle will set the published date to the date you flick that switch.
Starting to Plan
To begin planning, click Start Plan alongside the relevant subject.
Please ensure that your subject curriculum is finalised and published before you begin setting up your plan. Click here for more information on customising your curriculum.
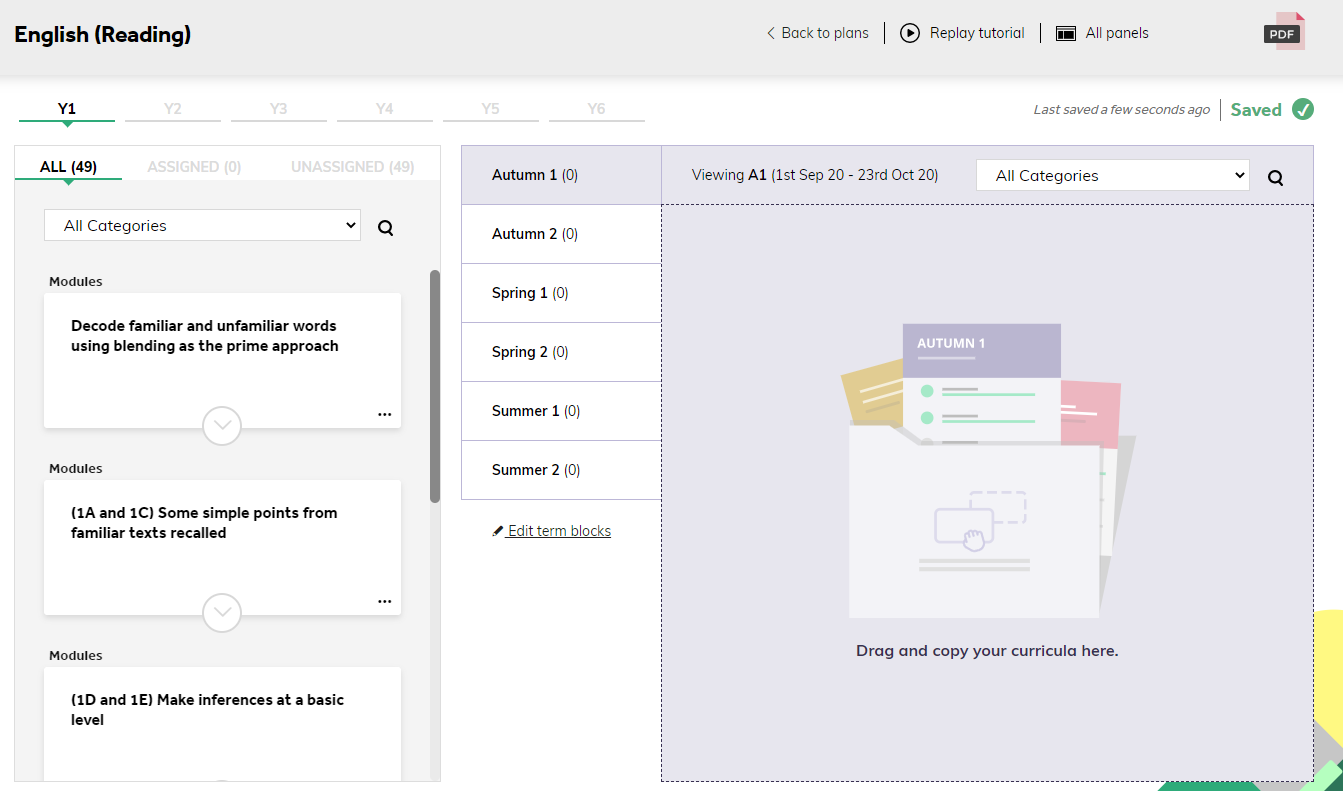
The page is split into two panels. On the left, you'll see the curriculum of your chosen subject. On the right, you'll see term blocks, with a curricula preview panel.
Balance lets you choose between three screen options.
- All Panels - This is the default mode, showing you everything on the page that you'll need to assign your curricula.
- Term block view: This allows you to focus more on reviewing what has been placed into each term block.
- Distraction-free view: this declutters the rest of the page, so you can just concentrate on planning your term with laser focus.
Select the relevant year from the tabs across the top, then simply drag and drop parts of your curriculum into the term blocks to start planning. You can select multiple modules at once by clicking on the cards, or alternatively, singular sub-modules or objectives where required.
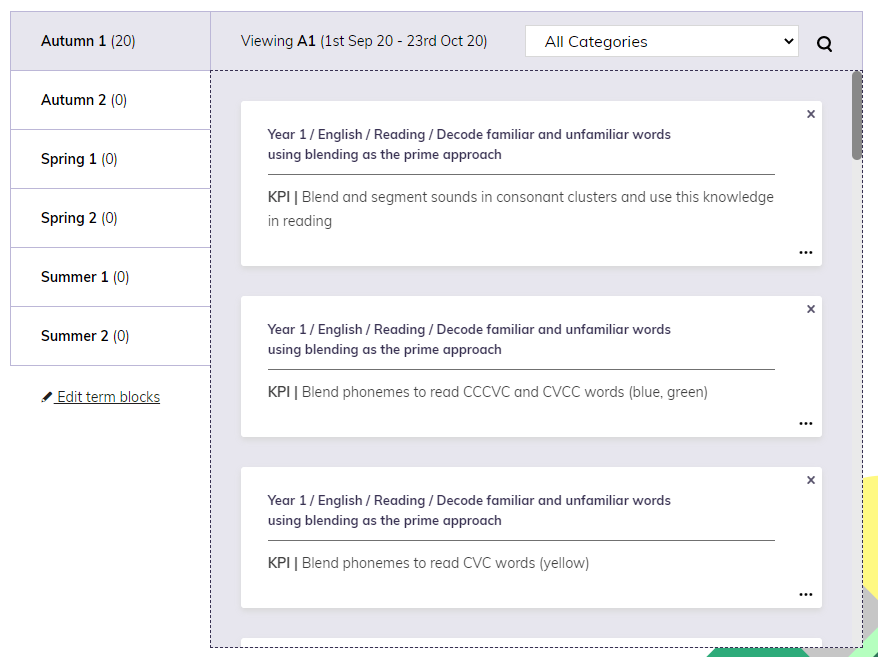
The Autumn 1 term is selected by default, so don't forget to change this to a different term, if necessary.
When you drop a module, sub-module or objective (both KPI & non-KPI objectives) in, the panel on the right will populate with the information. If you drag and drop an entire module then all sub-modules and objectives will be carried across with it. You can then use the panel on the right-hand side to remove any specific sub-modules or objectives if required. Click on the cross in the top right corner of the card to remove that item.
Tip! Use the Assigned and Unassigned tabs to see which objectives you have already assigned and which ones you have left to assign.
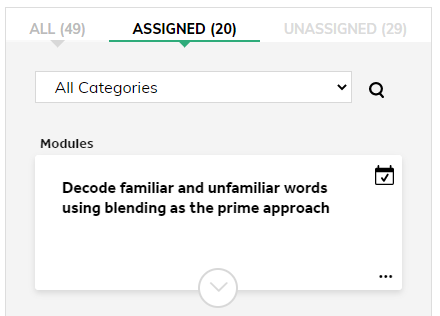

The above icon indicates that a single objective or all objectives within a module or sub-module have been assigned to a term block.

The above icon indicates that a module or sub-module contains unassigned objectives.
Switching Between Term Blocks
The middle column on the Planning page shows all of your term blocks. Use this column to flick between blocks, so you can see what's been assigned to them. The number in brackets next to the term block shows you how many objectives that term block is holding.
Your term blocks can be customised by your Balance administrator if they're not quite right. This is done via Admin > Planning, or by clicking Edit Term Blocks on the Planning page
Duplicating parts of the curriculum
Curricula items can be assigned to more than one term block, which is especially handy for when they need to be revisited a few times throughout the year, or built upon.
Simply click and hold your chosen module, submodule or objective on the left and holding down, drag it over the term block of your choice, it will be assigned immediately.
Downloading your Plans
Now you've finished your plan, it's time to put it in a format you can download.
Select the PDF icon in the top right corner of the screen to download your plan. You can choose whether you want to create a PDF showing all term blocks or just a few you've selected.