
Creating and editing groups within a class in Balance is straightforward and simple. Teachers can create as many groups as they like within their own class.
Making use of in-class groups makes it easy for teachers to segment their pupils for speedy analysis or assessment, thanks to Class Groups appearing in the ‘Universal filters’ throughout Balance!
Quick Steps
- Navigate to My Pupils
- Select Create/edit class groups
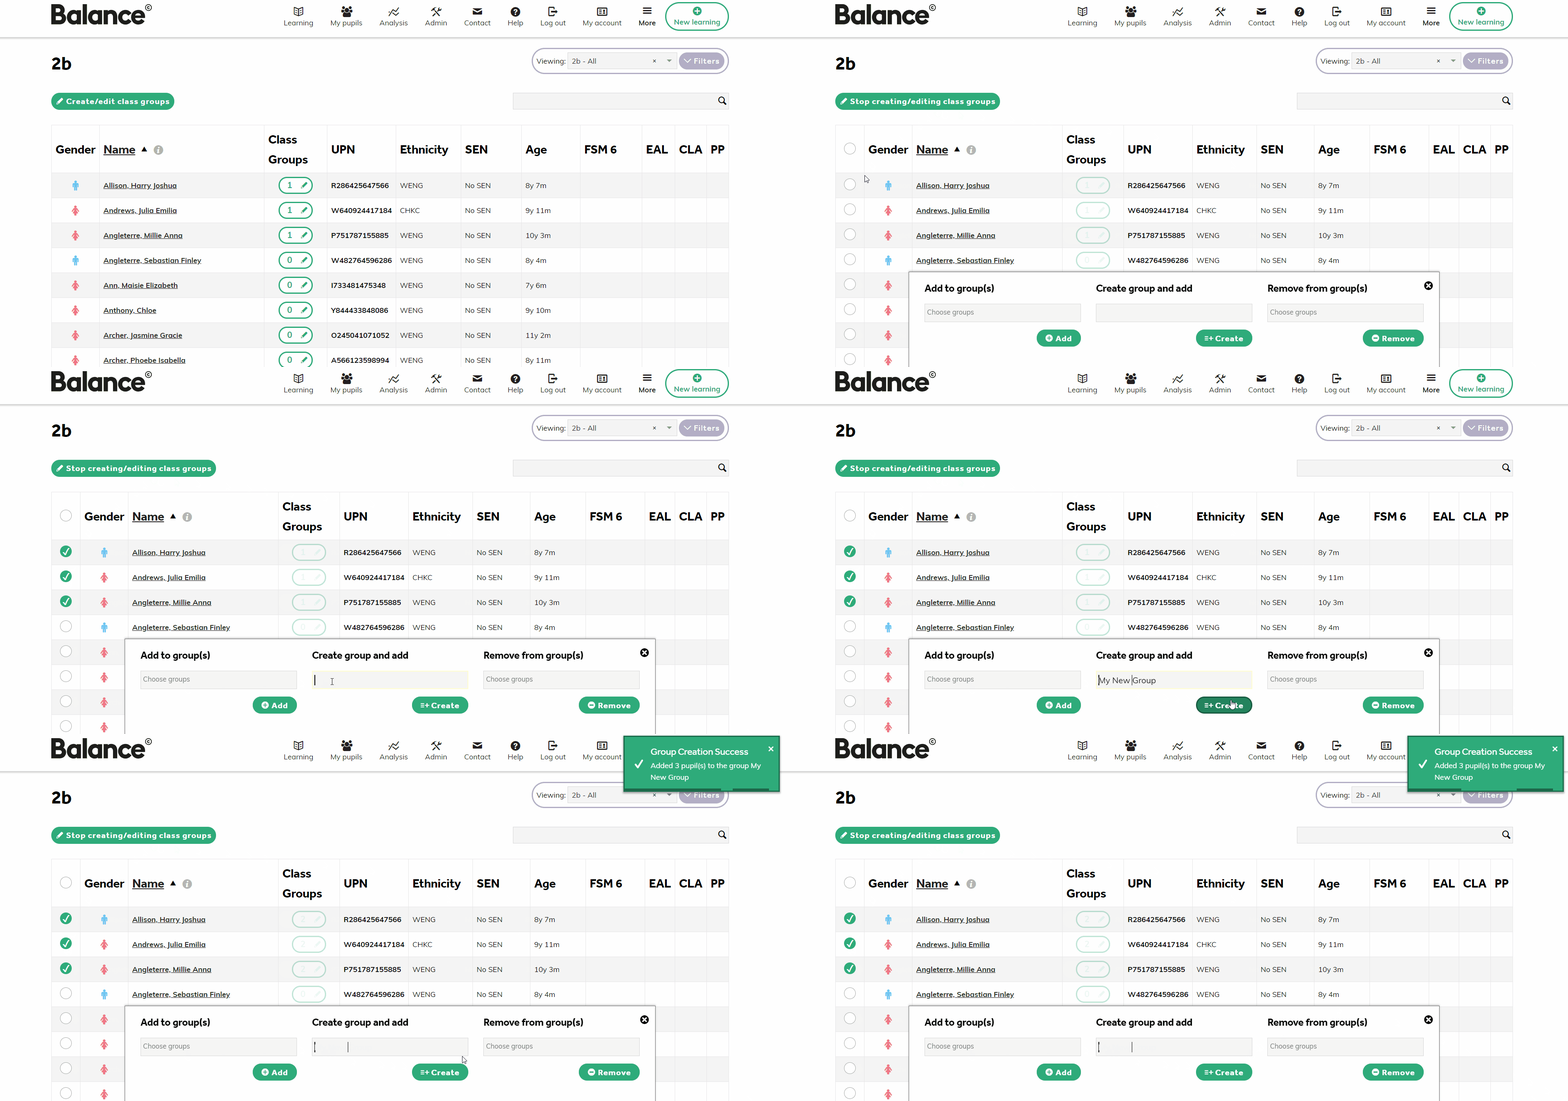
- Select the circle next to the Gender column heading to choose all pupils. Alternatively, you can select an individual pupil by clicking on the circle next to their name.
- Once you have selected the pupils you want, type in a name for your new group in the control panel at the bottom of the page
- Then click the Create button to finalise.
Need More Detailed Help?
How to Create Class Groups
Select the My Pupils tab from the top navigation to open the My Pupils page.
Select the Create/edit class groups button to create or edit a class group.
Multi-select circles will appear next to each pupil’s name. You can select the circle next to the Gender column heading to choose all pupils. Alternatively, you can select an individual pupil by clicking on the circle next to their name.
Once you have selected the pupils you want, type in a name for your new group in the control panel at the bottom of the page (under the heading Create group and add) and then click the Create button to finalise.
Continue adding in-class groups as you wish. Simply select the ✖ icon or the Stop creating/editing class groups button when you are finished.
How to Edit Multiple Pupils’ Group Memberships
To add/remove multiple pupils to an existing in-class group, simply follow the steps above, selecting all the pupils you wish to add/remove.
In the control panel that appears at the bottom of the page, start typing the name of the existing group(s) you wish to edit under either the Add to groups heading or the Remove from group(s) heading. Groups will automatically appear in either drop-down as you begin to type.
Choose the group(s) you want to add the selected pupils to and select the Add button to finalise your additions.
Choose the group(s) you want to remove the selected pupils from and click the Remove
button to finalise.
How to Edit an Individual Pupil’s Group Membership
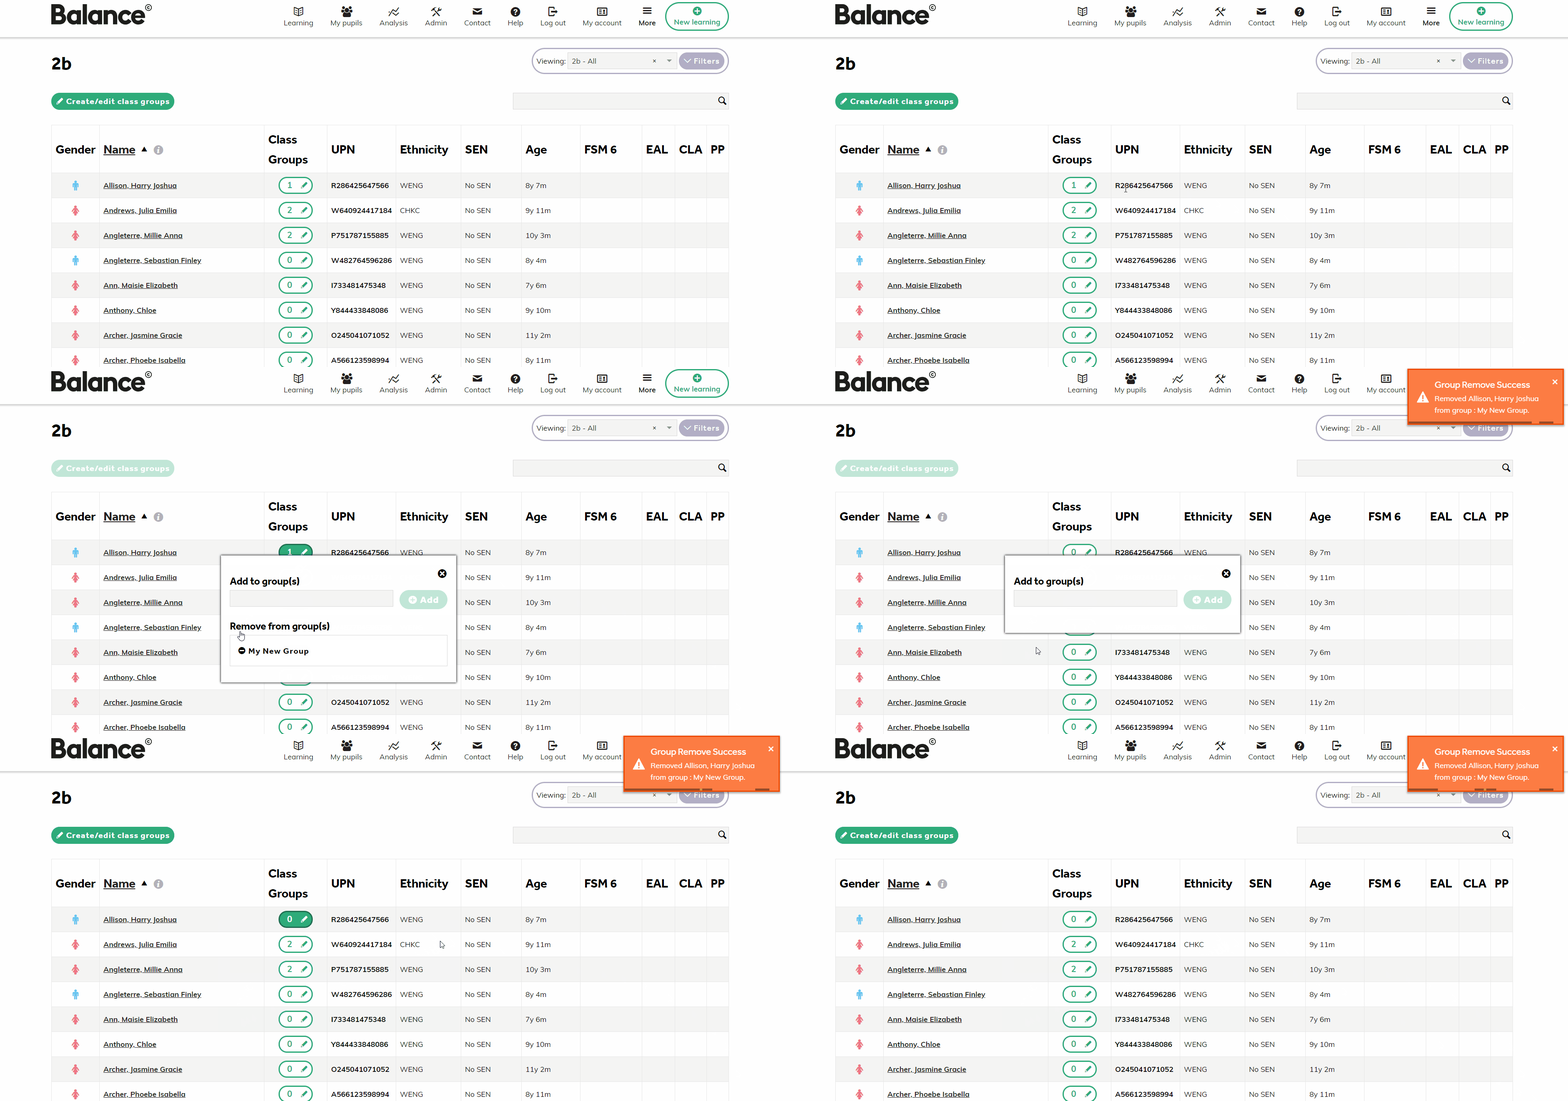
You can add/remove individual pupils to existing in-class groups directly from the page. Next to the pupil’s name, click the edit button (under the ‘Class Groups’ heading).
Use the pop-up that appears to add/remove that pupil to/from existing class groups.
To add the pupil to an existing class group, type in the group name and select the Add button
to finalise.
To remove the pupil from an existing class group, click the remove icon next to that group’s name. The pupil will immediately be removed from the group
A pop-up message will briefly appear in the corner of your screen to confirm your edits have been saved!
How to Delete or Edit Class Groups
Navigate to your account details by clicking on My Account.
Select the Class Groups tab to view a list of all in-class groups that you have created, how many pupils are in each and which class each group belongs to.
Top Tip: If you have lots of class groups, click on the table headings to sort your list and find the groups you want to delete more easily!
Select the bin icon next to the class group you wish to Delete
Select the pen icon next to the class group you wish to Edit
A warning message will appear asking you to confirm that you want to delete the group.